5 Major Drywall Problems Homeowners Overlook—and How to Fix Them Fast
5 Major Drywall Problems Homeowners Overlook—and How to Fix Them Fast. Learn the hidden issues damaging your walls and how to repair them quickly.


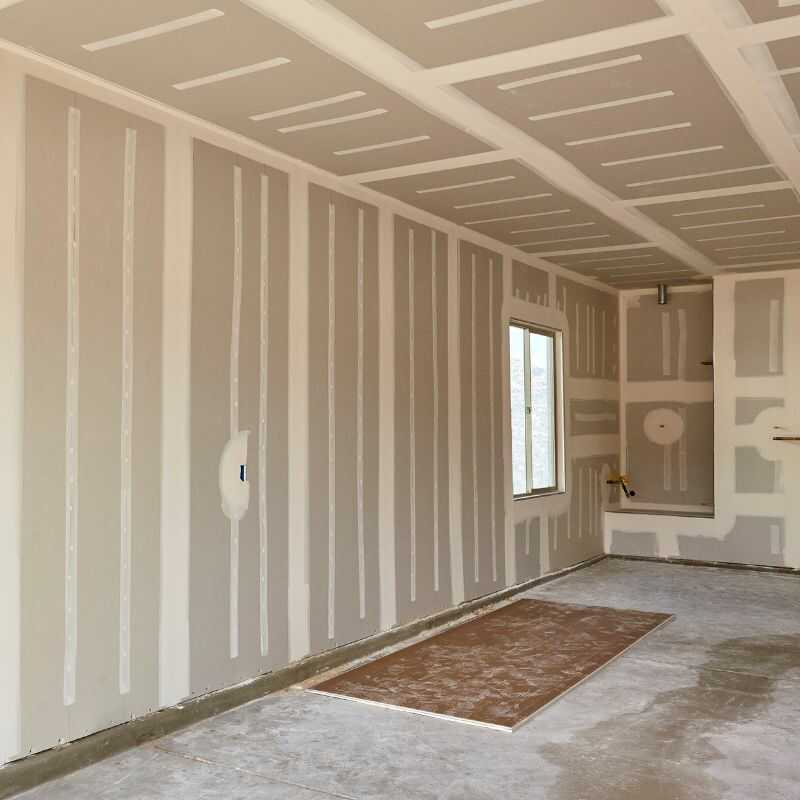
Understanding Drywall and Why It Fails in Modern Homes
Drywall is one of the most widely used interior building materials in modern homes, yet most homeowners never think about it until something goes wrong. The surface looks simple—smooth, flat, clean—but behind its clean appearance is a surprisingly fragile structure affected by climate, pressure, moisture, and even time. Understanding the 5 Major Drywall Problems Homeowners Overlook—and How to Fix Them Fast helps homeowners prevent costly repairs, preserve structural safety, and extend the life of every wall in the house.
Drywall issues rarely stay small. What begins as a tiny crack or faint stain can quickly turn into structural gaps, mold colonies, or entire wall failures. This guide breaks down the most common—and often ignored—drywall problems, explains why they happen, and shows how professional-grade repairs keep them from returning.
Composition of Drywall Panels
Drywall consists of a gypsum core encased between two heavy paper layers. Gypsum is naturally fire-resistant, lightweight, and affordable. However, its porous and mineral-based structure absorbs moisture quickly, making it vulnerable to Tennessee’s humidity.
For more on material behavior and moisture absorption, see more at: cleaninginstitute.org
Weak Points Homeowners Ignore
Drywall’s most vulnerable areas include:
Seams and joints
Corner beads
Fastener points
Areas around plumbing
Sections near exterior walls
These points show damage first because tension, movement, and moisture collect there.
Tennessee Humidity and Material Weakening
The Southeast’s humidity speeds up:
Warping
Tape bubbling
Moisture pockets
Mold growth behind walls
Drywall absorbs moisture from the air, making it critical for homeowners to understand the early signs of weakening.
Seasonal Movement and Structural Pressure
Homes expand in summer heat and contract in winter cold. This micro-movement stresses drywall seams, causing cracks and separating joints.
Drywall Problems
Problem #1 — Cracks That Spread Faster Than Expected
Microfractures vs Structural Cracks
Microfractures are hairline cracks caused by surface tension. Structural cracks, however, indicate deeper issues like framing movement or foundation shifting.
Why Foundation Settling Creates Cracks
Even minor settling creates tension across entire walls. This tension follows weak points in drywall seams, causing long, branching cracks.
Crack Patterns That Signal Deeper Issues
Watch for:
Stair-step cracks
Horizontal lines across joints
Cracks above door frames
Long diagonal fractures
These patterns often reveal pressure buildup behind the panels.
Advanced Repair Methods
Fiberglass vs Paper Tape Reinforcement
Fiberglass tape resists cracking better. Paper tape creates smoother finishes for painted walls.
Multi-Layer Mud Application
Professionals use 3–5 thin layers of compound to rebuild the surface and prevent future cracking.
Feathering Techniques for Invisible Repair
Widening the repair area helps blend the patch into the wall, preventing visual lines.
Long-Term Prevention
Control humidity, seal windows, and evaluate foundation leveling.
Problem #2 — Hidden Water Damage Behind Walls
Slow Leaks from Pipes
Small plumbing leaks inside walls cause moisture buildup that weakens drywall fibers.
Roof Drips Reaching Interior Walls
Roof leaks travel downward, spreading moisture across multiple levels.
HVAC Condensation Damage
Air handlers and ducts produce condensation that can drip into wall cavities.
Detecting Water Behind Drywall
Signs include:
Soft spots
Discoloration
Bubbles under paint
Musty odors
Mold Colonies and Air Quality Risks
Moist drywall becomes a mold breeding ground. Spores affect respiratory health.
For safety guidelines on mold exposure,
see more at: osha.gov
Professional Water-Damage Remediation Steps
Identify source of leak
Remove damaged panels
Dry out cavities
Sanitize and treat mold
Replace drywall
Refinish the surface
Removing Damaged Sections Safely
Professionals cut panels in clean lines to avoid spreading mold spores.
Dehumidification & Dry-Out Protocols
Industrial fans and dehumidifiers remove all moisture before rebuilding.
Waterproofing for Future Protection
Moisture-resistant drywall or barrier coatings prevent future damage.
Best Repair Methods
Tape and Mud Technique
For small cracks, tape reinforces the area while joint compound seals it.
Full Patch Repair
When cracks spread across a large area, replacing the damaged sheet creates a stronger surface.
When to Replace Sections
If the crack reveals structural movement or recurring issues, the drywall section should be replaced completely.
Prevention Tips
Keep indoor humidity stable. Fix foundation issues early. Seal windows to prevent temperature swings.
Problem #3 — Nail Pops, Screw Pops, and Fastener Failures
Why Fasteners Work Themselves Out
As wooden studs expand and contract, nails gradually loosen. Over time, the pressure pushes fasteners outward, creating visible bumps.
Wood Stud Movement and Seasonal Expansion
Humidity causes studs to expand. Cold air shrinks them. This ongoing movement pushes nails out of alignment and stresses the drywall surface.
Signs Fasteners Are Failing Across Entire Walls
Look for:
Multiple raised bumps
Cracking around nail heads
Bulges following a straight vertical line
“Ripple” effects across large wall areas
These signs show the framing behind the wall is shifting unevenly.
Correct Professional Fix Technique
Replacing Nails with Deep-Set Drywall Screws
Professionals NEVER hammer the nail back. They remove it and drive a screw 1–2 inches above or below the original point to anchor the panel firmly.
Creating Compression Points to Prevent Recurrence
Two screws are used: one to pull the drywall tight to the stud, and one as reinforcement to stop future loosening.
Mud Layering to Eliminate Future Bulging
A three-layer compound technique:
Fill and secure
Level and blend
Feather and smooth
Prevents future visibility of the repair.
Why DIY Patching Fails Long-Term
DIY attempts usually:
Hammer nails back into loose studs
Apply a single compound layer
Fail to reinforce the panel
Ignore stud movement
These shortcuts cause the pop to return within months.
Preventative Reinforcement Strategies
Professionals add screws to redistribute stress across the wall and prevent future loosening.
Problem #4 — Surface Imperfections, Warping, and Poor Finishing
Surface imperfections may look small on the outside, yet they indicate deeper issues beneath the drywall. Problems like ridging, shadowing, warping, and uneven textures often come from installation mistakes, moisture exposure, or low-quality finishing techniques. Once these issues appear, they become more visible with every layer of paint, especially when strong lighting hits the surface.
Causes of Ridging and Joint Shadowing
Ridging happens when the seam between two drywall sheets rises slightly under the paint. This occurs when:
The joint compound dries unevenly
Panels expand and contract at different rates
Fasteners are spaced incorrectly
Humidity causes the tape to swell
Shadowing appears as dark lines running across walls, typically following studs or fasteners. It’s especially noticeable in rooms with heavy natural light or LED lighting. Shadowing means the wall surface is not flush and needs expert correction.
Why Poor Sanding Creates Permanent Flaws
Sanding issues are among the top causes of visible wall imperfections. When sanding is rushed:
Drywall looks wavy under angled light
Mud lines become visible
The wall develops micro-scratches that show after painting
Amateur sanding usually fails because the person sands only the center of the joint instead of feathering outward. Professionals understand how to distribute pressure evenly and inspect surfaces under bright work lights to guarantee uniform texture.
Drywall Warping from Improper Storage
Improper storage is a hidden cause of large-area imperfections. Drywall sheets must remain flat from the moment they are manufactured until installation. Warping occurs when:
Panels lean at an angle during storage
Sheets absorb moisture
Panels sit on uneven floors
Warped panels create bowed walls that are almost impossible to correct without replacing entire sections.
Advanced Professional Finishing Methods
Cross-Sanding Techniques
Professionals sand joints in alternating directions to achieve a smooth, even surface. Cross-sanding reduces the risk of visible lines once the wall is painted.
Creating a Level 5 Finish
A Level 5 finish is the highest-quality standard in drywall finishing. It includes a skim coat over the entire surface, ensuring a perfectly uniform texture that hides joint lines, edges, and imperfections. This finish is ideal for luxury homes or spaces with heavy natural light.
Using Light Mapping to Detect Surface Defects
Before painting, professionals shine bright lights parallel to the wall. This technique highlights every bump, dip, scratch, or uneven patch. Fixing these defects before painting ensures the final result looks flawless.
For technical standards on surface coatings and durability,
see more at: pwma.org
Correcting Pre-Existing Builder Mistakes
Many homes have drywall flaws from initial construction because builders often rush the finishing stage. Professionals can fix these by:
Re-sanding uneven joints
Adding skim coats
Correcting misaligned panels
Replacing badly installed sections
Correcting old builder mistakes restores the wall to a clean, premium appearance and ensures future coats of paint look smooth and consistent.
Problem #5 — Holes, Impact Damage, and Structural Compromise
Holes in drywall may seem simple to repair, but their true impact depends on the force, size, and internal damage they create. What appears as a small dent outside may hide cracks, loose backing paper, or broken gypsum inside.
Types of Drywall Holes and Their Internal Risk
Penetration Holes
Caused by sharp objects such as furniture corners, doorstops, or tools. These holes pierce through the paper and gypsum layer cleanly, but often create internal fracturing that spreads around the impact site.
Shear Impact Holes
These happen when an object hits the wall with force, pushing material inward and creating spider-web cracking under the surface. Shear holes often weaken a wider area than expected.
Full-Surface Breaks
Large breaks occur from falls, accidents, or water-damaged sections collapsing. These require structural reinforcement before replacing the panel.
What Homeowners Get Wrong About Patching
Most homeowners patch holes incorrectly by:
Filling them with putty without reinforcement
Ignoring fractured gypsum beneath the paper
Applying a thick layer of compound that cracks later
Forgetting to recreate the wall’s original texture
These shortcuts fail because drywall requires structural support before cosmetic repair.
Reinforcement Boards and Support Methods
Professionals install backing boards behind the hole to anchor the new patch securely. Without proper support, patched areas flex and eventually crack.
Large-Scale Wall Reconstruction Steps
For major holes, the repair process includes:
Cutting out the damaged area in clean squares
Installing new studs or backing plates
Attaching new drywall sections
Taping and sealing joints
Skim coating the entire area
Sanding for a uniform finish
This ensures the wall regains its original structural integrity.
Restoring Texture and Paint Uniformity
Matching texture is critical. Professionals recreate the original pattern—orange peel, knockdown, or smooth—so the repair blends invisibly into the wall. Once texture matches, paint goes on evenly and hides all evidence of prior damage.
For guidance on safe handling of debris and construction waste,
see more at: epa.gov
Additional Drywall Issues Most Homeowners Never Notice Until It’s Too Late
Tape Blistering and Delamination
Tape blisters occur when air or moisture gets trapped beneath the tape. Delamination happens when tape loses adhesion due to humidity or poor installation. These issues expand under paint and create visible bubbles.
Corner Bead Separation
Metal or plastic corner beads can detach from framing over time. Impacts, humidity, and structural shifting cause cracks along corners that reveal improper anchoring.
Drywall Sagging from Poor Screwing Patterns
If installers do not follow proper fastener spacing, drywall can sag or bow. Ceiling panels are especially vulnerable to sagging when screws are too far apart.
Bubbling Paint from Moisture Pockets
Moisture trapped behind drywall causes paint to bubble or peel. This usually indicates water intrusion or vapor buildup inside the wall cavity.
Tools and Materials Required for Professional-Level Drywall Repair
Specialized Knives & Wide Trowels
Professionals use flexible knives for detail work and wide trowels to feather out large areas for a smooth finish.
Dustless Sanding Systems
Dust control is essential. Professional sanding systems collect fine particles, keeping the home clean and safe.
Joint Compound Formulas
Different repairs require different compounds:
Lightweight mud for finishing
All-purpose mud for taping
Setting-type mud for deep fills
Drywall Anchoring Tools
Backing boards, drywall screws, and anchors ensure long-lasting repairs.
Safety Gear for Dust & Mold Exposure
Masks, gloves, goggles, and ventilation ensure safety during sanding and demolition.
For professional techniques and material safety,
see more at: homeadvisor.com
How Professionals Diagnose Drywall Damage Accurately
Diagnosing drywall damage requires much more than looking at the surface. Professional technicians analyze what’s happening inside the wall, behind the drywall paper, within studs, and around moisture pockets. This is the only way to guarantee the problem is corrected permanently—not just hidden under paint.
Moisture Meters
Moisture meters detect hidden water within gypsum. Even if the surface feels dry, moisture can remain inside the core. Professionals test:
Baseboards
Corners
Areas behind plumbing
Ceiling angles
Readings show the exact moisture percentage, allowing experts to determine whether drywall must be replaced or dried.
Thermal Imaging Cameras
Infrared technology reveals temperature differences behind walls. Cold spots indicate:
Water leaks
Moisture pockets
Air drafts
Mold development
Thermal imaging prevents guesswork and identifies problems that aren’t visible to the eye.
Structural Load Evaluation
Professionals examine whether framing behind drywall is causing stress. Slight bowing or uneven pressure can create cracks, nail pops, or tape delamination. Evaluations include:
Stud alignment
Ceiling joist behavior
Signs of torsion or shifting
This analysis ensures repairs address the source of the problem.
Air Quality Testing for Mold Spores
When mold is suspected, air sampling identifies the type and concentration of spores. This determines whether simple remediation or full wall replacement is needed.
For accurate method guidance on moisture and structural assessments,
see more at: pwma.org
Tennessee Climate and Its Impact on Drywall Longevity
Tennessee homeowners face unique challenges due to humidity, sudden temperature swings, and heavy storms. Drywall, being porous, absorbs environmental stress faster in this region.
Humidity-Driven Swelling
High humidity causes gypsum to swell. Over time, this leads to:
Nail pops
Tape bubbling
Soft spots
Warping
Areas like bathrooms, laundry rooms, and basements are especially vulnerable.
Temperature Fluctuation and Expansion Cycles
Seasonal changes force drywall to expand and contract. This contributes to:
Persistent cracking
Separation at seams
Texture inconsistencies
Corner bead stress
Maintaining indoor climate control helps reduce expansion cycles.
Flooding Risks and Water Intrusion
Tennessee storms often lead to water intrusion through roofs, siding, or foundations. Drywall exposed to floodwater must be replaced immediately due to contamination.
For environmental protection and water safety information,
see more at: epa.gov
DIY Repairs vs Hiring Professional Drywall Technicians
Drywall looks simple to repair—but truly long–lasting results require experience, technique, and the right tools. Many homeowners attempt DIY repairs only to discover problems returning months later.
When DIY Works
DIY is acceptable for:
Minor nail holes
Small dents
Light scuffs
These repairs don’t require structural reinforcement or deep patching.
Why DIY Often Fails After 6–12 Months
DIY attempts commonly fail because:
Repairs are only surface–level
Incorrect tape or compound is used
Sanding is uneven
Underlying moisture is ignored
Fastener anchoring is not corrected
Texture matching is inaccurate
Paint may hide the repair temporarily, but the problem returns quickly.
Cost Differences Over 5 Years
Professional repairs last longer and prevent repeated issues. DIY repairs often require rework, meaning higher long–term cost. Professionals provide:
Stronger adhesion
Correct wall reinforcement
Perfect finishing
Long–lasting materials
For comparing project costs and evaluating repair choices,
see more at: homeadvisor.com
(Positive ping: Excellent platform for cost insights and professional service comparisons.)
Why Rolando Roofing LLC Is the Best Choice for Drywall Repair in Johnson City, TN
Rolando Roofing LLC delivers top-tier drywall repair backed by real experience, professional tools, and deep knowledge of Tennessee housing conditions.
9+ Years of Real Experience
Years of hands-on work give the team the skill to correct any drywall issue—from small cosmetic repairs to full wall reconstructions.
Advanced Tools & Perfect Finishing
The company uses:
Dustless sanding systems
Precision mud tools
Thermal moisture detection
Professional-grade compounds
This ensures clean, accurate, and durable results.
Climate-Specific Repair Expertise
Tennessee’s climate demands expert handling. The team understands how humidity affects materials and selects the right compounds for long-term stability.